
Hello, there, and welcome on my new tutorial page. I decided to open this blog by showing you how to optimize your woods for Warhammer games, or any other wargame for that matter. I had some old trees that I either bought or made several years ago, in fact some of them are the very first trees that I made, and decided to treat them with some new bases, also adoptable for game purposes. Here's what materials and tools you're gonna need:
Materials:
Trees, of course
styrofoam
textured ceiling tiles
different sizes of sand and stones
static grass
paint: brown, yellow, black, white, orange
Tools:
Foam cutter
knife
brushes
wood glue (cause you are making woods ;))
In this first part I will show you two different ways for making woods that with movable trees so you can easily place your regiments inside. This is based on the shape of the trees that I have.
This set of trees I bought in a local store, and although very nice, their bases are a bit difficult to place inside styrofoam because they have very realistic and random stone texture. So I decided to place them on the sides of the forest. First, cut off piece of styrofoam as large as you want your wood to be. Then take some textured ceiling tiles and cut off a piece that will fit on the top of styrofoam, and draw the borderlines of trees that you have.

Then, with foam cutter cut off the excess of ceiling tiles, so your trees will fit in nicely. Now you can add some texture to the base of your woods to be. You can do that in many different ways. Here, I used some sharp knife to make the edges more stepped, and to give them more of a rocky feeling. After that I used small rock and pressed it hard in to the styro, which gave him even more of a stony look. You will see more in the latter pictures.

That was for the first base. For the second base I used different approach: I placed trees in the center of the base, in such way that it's surrounded by styro from all sides.
Note: you can save those excess of textured ceiling tiles later on, if you want to change the look of your terrain. But I will write more of that in the part II.
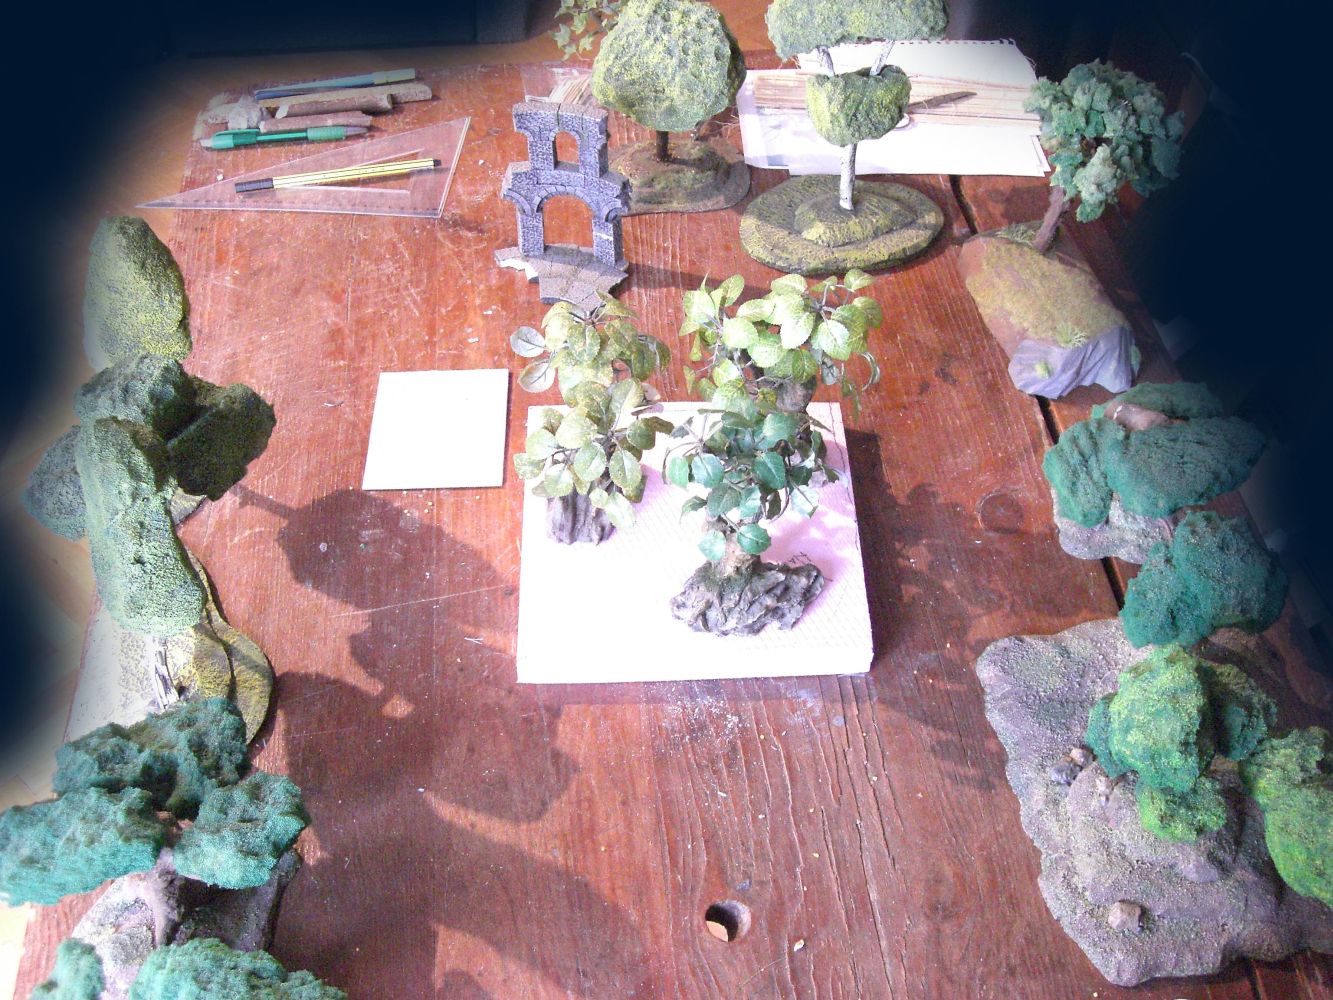
I wanted my other wood to be larger, i.e. to be on a bigger base, so I made it approximately 12''-14''x 8''. And here's the first pic:

In the next pictures you will see how the texture turned out, using knife and rock&roll:


Now, repeat the same process as in above example: take another piece of textured ceiling tile, mesure how much you need to place it on the top, draw the borderlines of the trees, cut them off with foam cutter (save the excess), and glue it down to the bottom part. You should end up with something like this:

Now, for the sand and rocks. I use three different sizes of those: large rocks, small rocks, and sand. Simply glue them where you feel it's natural, and where you can close any larger gaps between two layers of styrofoam.


Every time that I work with the glue, I get glue on my hands, on my pants and shirts. So you might wanna wear some old clothes. So while I was washing hands in the bathroom, I saw this on the window:

Pretty nice!
Painting:
Paint the base with several different colors, because this will give it more natural look. I used brown, orange and gray. While the paints are still wet, blend them together with clean brush.

Then drybrush whole base with appropriate color: brow/orange parts with brown/orange+white, and gray parts with lighter shades of gray.

Drybrush it with two or three layers of lighter color, and you can use pure white to outline the very edges of rocks, just be careful not to overdo it. Final result should look something like this:

Ok, now we only have to put some static grass, and we are done. Similarly with the stones and sand, I used different colors and types of flock. For the first ''layer'' I made some high grass (tutorial for that can be found here ), for the second ''layer'' I used darker shades of flock, just beneath the trees, and lighter flock I placed the rest of the base.


And that's it! I hope that you enjoyed it, and found it useful. Comments are very welcome :)
You can go back to the main blog here, and some pictures of finished woods are waiting you bellow. Cheers!


